Relief printing
Relief printing refers to artistic techniques such as letterpress, woodcut, linocut, material printing, etc. The printing areas are the raised areas.
The studio is equipped with typesetting letters in sizes from 6 pt to 96 pt. Linoleum plates, soft-cut plates, and wood can be purchased in the studio. Tools for woodcutting and linocut are available. A platen press (DIN A5) and a scallop press (max. 52 W × 57 L cm/max. print area 49 × 56 cm, max. print height approx. 2.4 cm) are available for printing. The etching press can be converted for larger formats; the print area is 80 × 120 cm.

Explanation
All types of printing techniques in which the ink-receiving and ink-releasing parts of the printing form are raised, are considered relief printing. This includes information transfer without ink, known as blind embossing, which is only possible with a raised form.
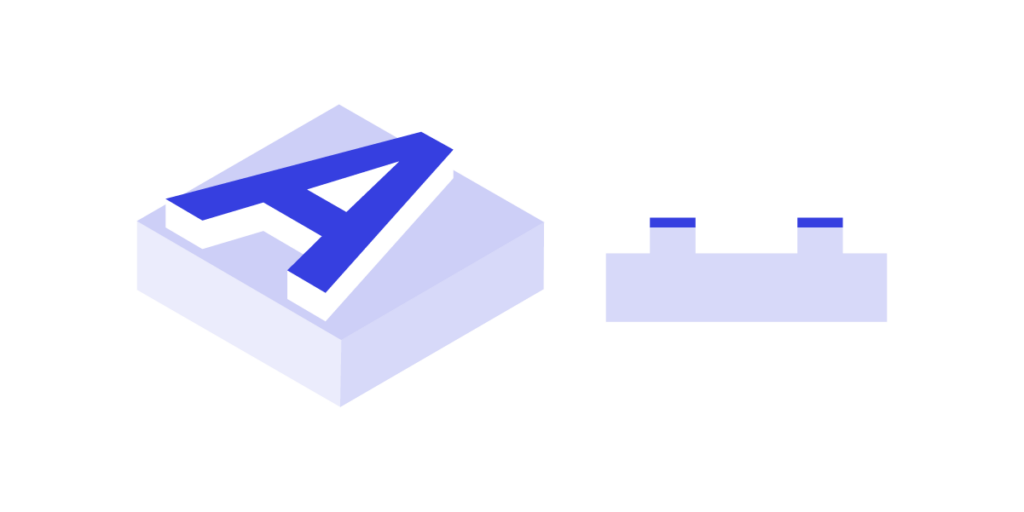
The relief printing process is based on the principle of pressure and counter-pressure. Only the raised, reversed parts of the printing form are inked during the printing process, and only these parts release ink during printing, creating sharp contours, while the non-printing parts are lowered.

Features:
- Printed elements, such as letters and halftone dots, lines, and areas, have a typical squeeze margin, meaning that the ink has been squeezed over the visible edge contour in the printing direction.
- Shading depends on the substrate thickness and the embossing (except for flexographic printing and letterset) into the substrate.
- Typical form of screening (for printing plates).
- The color of the printed elements has the same density across the entire sheet if the ink has been applied evenly.
Relief printing includes letterpress printing, flexographic printing, embossing and blind embossing, woodcut and wood engraving, linocut, metal cutting, zinc etching, material printing, and others.

Technical procedure for woodcut and linocut
1. Material
Linoleum is generally softer and has a homogeneous, untextured surface. The linoleum currently used primarily for linocuts (and also most of the linoleum used for flooring) has a fabric on the back that can be used for textured prints. The cut surface is slightly porous, which can be seen on large areas of the paper when the pressure is set with no or minimal embossing and a short ink run. If this is undesirable, the pressure must be increased and the ink flow increased. This linoleum also “crumbles” very quickly when cut, in contrast to the even softer floor coverings from the GDR era, which, because they lacked a fabric backing, stretched like rubber when cut. Linoleum can be cut to a wide variety of bases using the simplest tools (scissors, knife, cutter), allowing “mosaic” cutting and multi-color printing of composite, differently colored shapes in a single printing process.
Linoleum is a good material when you want to overcome low material resistance with less cutting force while achieving continuous colored surfaces. With good cutting execution and optimal pressure, even long runs are possible.
In woodcuts, the non-printing parts are removed/cut out of the longitudinal grain of the wood (horizontal grain). In contrast, wood engravings work into the end grain, i.e., the vertical grains that can withstand even greater pressure. Woodcuts and wood engravings are collectively known as xylography.

(Almost) all types of wood are suitable for woodcutting. Hardwoods such as pear, walnut, or cherry allow for the largest print runs, but require more cutting force due to their material resistance. They are particularly popular for more detailed graphics, as they produce fine lines more effectively and permanently than softwoods. Softwood requires less cutting force, and the achievable print run is usually sufficient. They are particularly suitable for large-scale work and have the additional advantage that large panels or boards are cheaper to purchase than hardwood ones.
Blockboard and especially plywood are also used, and less frequently, chipboard and veneer boards. These wooden forms are popular with printmakers because they do not warp and are also available inexpensively in larger formats.
2. Motif / design
When cutting, it is important to remember that for direct printing (where the ink is transferred directly from the printing form to the material), the printing form must be mirrored.
If areas and lines aren’t well thought out, problems with the representation can easily arise. In black and white printing, there are no shades of gray that can mediate between black and white. Creating a black line on a black surface is also difficult—it requires an additional print run with a new printing plate.
It’s therefore important to create a design as accurate as possible in the original size beforehand. The design should be colorfast, mirrored, and then transferred to the printing surface. This prevents the size of the printed elements from mismatching the mold or cutting tools.
3. Cutting
A so-called »safety board« is recommended. It can be hung on the edge of the table, and the material to be cut is held in place by the raised rear stop bars, preventing it from slipping. The cutting direction should always be away from the body and the holding hand! Otherwise, there is a risk of injury!

There are 5 basic shapes of cutting knives used.
- The burin, actually an engraving tool used to cut/pierce straight or parallel lines into the wood.
- The goat’s feet, also known as gouges or ram chisels, which each have different V-shaped cutting edges and cut V-shaped indentations.
- The round chisel, also known as a round chisel or U-chisel, which, thanks to its pronounced, almost three-quarter-round cutting edge, can be used to cut particularly wide lines in a single cutting motion.
- The various gouges and flat chisels, used to cut away larger, non-printing sections. Some woodcutters work exclusively with these and forgo tools such as
- the contour knife or protractor, which are used in woodcutting to cut through the fibers when cutting against the grain and with which fine lines are cut in a single or V-shaped shape.
All of these tools have different cutting effects due to their different cutting edges and profiles. The handle design is very important for handling.
The side surfaces of the cut recesses should ideally slope slightly upwards towards the pressure element (cone – inclined support of the pressure surface) so that it can withstand the pressure force for longer.
4. Types of cutting techniques
In woodcut and linocut, the following possibilities exist, derived from the classic printing with black on white paper:
- White-line cutting: In this technique, the lines and images on the print are white or the color of the paper because they are cut from the printed surface. This technique usually requires less carving and is often used first. Albrecht Dürer already used this method, enhancing the artistic effect of his black-line woodcuts through inversions (negative representations).
- Black-line cutting: In this technique, the lines and images remain stationary during the carving process. They absorb the ink and transfer it to the paper, appearing as black lines. This is considered the most original form of woodcut.
- Surface cutting: Here, the image is composed primarily of large black and white areas. The wood grain is particularly beautifully emphasized. The artist Paul Gauguin often used crate boards for this purpose.
5. Multiple colour printing
Here, too, there are several possibilities:
- “True” color printing, also known as clay plate printing, with a dedicated form for each color.
- “Fake” multicolor printing, for which the different colors are applied side by side on the same form.
- The lost die (also known as “lost cut,” “degradation cut,” or elimination technique), where the form is further cut after each color has been printed.
- Puzzle printing, also known as mosaic printing, for which the individual color forms are assembled in a single printing process.
- Iris and gradient printing, in which the printing ink is applied in a rainbow-like gradient from the ink rollers to the printing form.
- Clair-obscur woodcut, also known as camaieu printing or camaieu cut.
and many more.
6. Coloring
A distinction must be made between water-based and genuine, oil-based letterpress/relief printing inks. Water-based inks generally have a longer tack, thus tending to shrink in the shadows and produce more crushed edges. They have shorter drying times and more often produce ring-shaped prints. Letterpress/relief printing inks can be easily adjusted in tack to suit the printing elements and the desired expression. They can also be worked with for hours without (usually) risk of drying out. Both types of inks require the appropriate cleaning agents for tools and printing plates.
Wood and linocut printing also allows the use of watercolor, tempera, and even oil paints – all of which, depending on the inking tool, offer specific means of expression, but also printing problems!
Coloring a linocut
If the dyeing isn’t done by machine, use a large enough hand roller to ensure an even (if desired) application of the dye. Always roll in several directions, if possible, and the final roller should be applied over the entire surface (parallel to the grain of the wood).
However, the coloring can also be done with a leather (traditional) or other color pad, with color pads, brushes, etc. – this again creates specific possibilities for expression.
During inking, the printing ink develops adhesive forces (attachment forces) to the printing areas of the printing form. The pressure with which the counterpressure element presses the printing material against the printing form also creates adhesion between the printing material surface and the printing ink. When the two media are separated, both adhesions pull on the printing ink film, causing it to split. This is called ink splitting. This occurs with every ink transfer, including from one ink roller to another. The remaining ink on the printing form (as well as on the rubber printing blanket, e.g., in offset printing) is re-inked, allowing ink to build up. This then leads, among other things, to an increase in dot value.
Color transfers must always occur from soft to hard and from hard to soft. Two hard bodies would also damage each other.
7. Printing
In general, a distinction can be made between machine and hand printing. With a hand print, the paper becomes slightly glossy (rub marks) on the reverse side due to the rubbing (also spoon, folding bone, etc.). A rub print is time-consuming; however, it gives the artist the opportunity to influence the final result by rubbing, depending on the type of colour on the printing block. However, this means that the differences between individual prints are greater than printing with a press.

There are three printing principles for printing presses:
Printing principle surface against surface. Knuckle-joint presses, stick presses and platen presses work according to this printing principle. The very high force required for printing (press pressure of around 50 kilograms for every square centimeter of the printing elements) limited and still limits the size of the printing format. Gutenberg first printed single pages and later up to the maximum paper format of 50 × 70 cm with 4 sides for cross-folding.
Surface against cylinder. Printing/proof presses and high-speed presses (the first in 1811 by Friedrich König – 1100 prints per hour, compared to Gutenberg’s 50 to 60 prints per hour)
Cylinder against cylinder. In 1865, the first rotary press was built by William Bullock (Philadelphia). The prerequisite was/is the paper roll with adhesive in the pulp, which was first produced in 1807 by M. F. Illig. In addition, he developed the Fourdrinier sieve machine. This printing principle cannot be used for original woodblocks, linocuts and lead typesetting forms. For this purpose, a cast would have to be produced from the original form, which was then filled on the inside with lead or plastic (stereos of a special cardboard or plastic), rubber or synthetic rubber (vulcanization/flexotype of a duroplast cast) or copper-plated on the inside in a galvanic bath with a low-voltage direct current (galvanization of lead, wax or Astralon/PVC foils). The duplicate printing forms obtained in this way could be mounted rounded on the cylinder and printed rotationally. However, this principle is still used today in letterpress printing to produce liner, flexographic and letterset products.
The principle of ready-made in letterpress printing: If the force, which remains the same over the entire surface, is distributed over printing elements of different sizes, flat elements receive too little pressure. At these points, silk or other papers are placed behind the material (usually paper) that is supposed to be printed on. A different height in the woodcut or the wear of the printing elements can/must also be compensated for by the finishing.

8. Drying process
Depending on its composition, application quantity and quality as well as the material, every printing ink in every printing process requires time for drying. There is surface drying and deep drying. There are no tables or diagrams for all possible combinations, there are only individual empirical values. Drying accelerators may be added to the ink, but this usually leads to other problems.
When products are placed on top of each other, printing ink that is not dry can cause them to set (stain) or even stick together. This is countered industrially with a wide variety of dusting powders.
Stack dryers are best suited for artistic letterpress printing in large quantities. One of these is used in the printmaking studio. Clamping/hanging systems are also commonly used.
If a specimen is required before »normal« drying, the colour surface can be slightly stabilized by powdering talcum powder (leads to permanent slight brightening).

History
Letterpress printing is the oldest of the four classic printing processes. Millions of years ago, our ancestors realized that they could leave tracks with their feet in (wet) sand and leave marks with the help of pigments on their hands. These »prints« have survived through the ages in prehistoric caves, e.g. very well preserved at Puente Viesgo on the north coast of Spain (over 40,000 years old).
This simple and ingenious process, which is used to sign contracts for people who do not know how to write, for example, and is still used today to identify criminals or to produce passports/ID cards, is a stamp in the classic sense – just like the potato »print« used in nurseries or schools. The appearance does not meet the demands placed on a production print: the edge areas look different with every fingerprint and the potato cut print surface changes with every stamping process … because printing is defined in this way:
Letterpress printing has a precursor dating back to antiquity in the printing of fabrics with wooden forms. The relief cut stones (raised areas are marked by rubbing) used for reproduction in China before the Common Era must be referred to as frottage. The earliest European woodcuts (including texts) can be dated to the end of the 14th century. In China, this technique was already in use before then and scrolls have been found that were produced as early as 868 by reproducing them using carved wooden letters. In Korea around 1390, word characters cast from bronze were already used.
In 1455, Gutenberg completed the printing of his 42-line Bible (Gothic script). He began producing smaller printed editions, such as the Donate (letters of indulgence/donation receipts) and calendars, with his employees in Mainz from around 1435/1445. He is the European inventor of letterpress printing with movable metal type and the hand-casting apparatus required to cast this type. Prior to this, letters were also occasionally »printed« in Europe using letters cut into wood and imitating the calligraphy of manuscripts (only small editions – durability of the material!). The space for the initials was left blank; they and colored lines were added by hand by illuminators. The sheets/books printed before 1500 are counted as early prints, they are called incunabula, i.e. cradle prints. The development of printing presses – the first were made of wood and constructed from the wine press – and the production of printing stock are therefore also significant for the history of printing.
Signing of prints
according to the »rules« by Lothar Lang, Der Graphiksammler, Berlin 1979
On the left side under the print, prints before the edition are marked with Roman numerals, possibly also as a proof = E.E., or as a proof for the artist (number = 10% of the edition size) = e.a./E.A. = Épreuves d’artiste = A.P., or outside the sale = h.c. = hors commerce; the edition, if the printing sequence is known, is marked as a fraction, with the serial number in the numerator and the edition number in the denominator. (Otherwise always 1–number of print run).
On the right is the signature and the date of creation, in the center a possible title and/or cycle. Sometimes the technique is also noted here.